
How to make your own BlockFace Kit
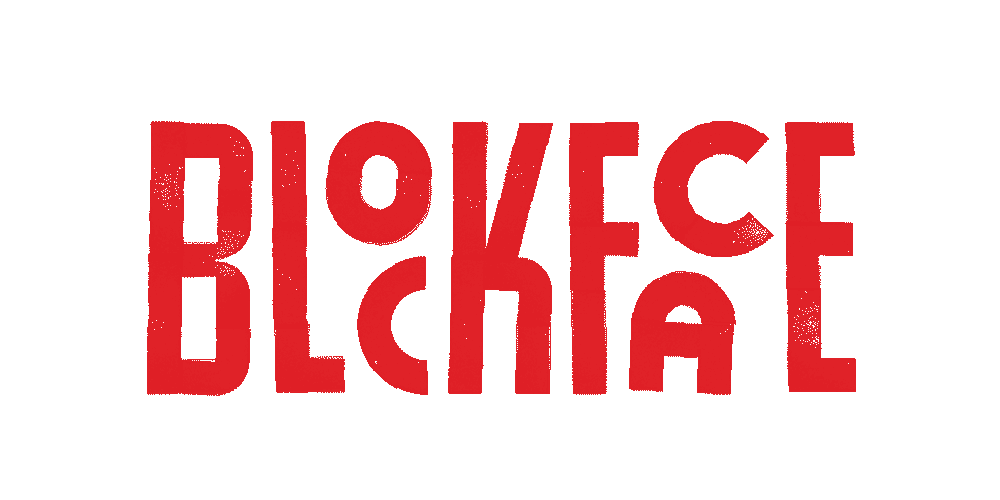
BlockFace is an easy-to-use modular typography printing kit designed by graphic artist Will Mower. Combine the stamps to construct letterforms, design typographic posters and cards, and explore the joys of printmaking.


This tutorial is about creating your own BlockFace Kit from scratch. If you'd like to save time and effort, you can also back the DIY Kit on our Kickstarter and receive the rubber stamp sandwich from us. This way, you'll only need to 3D-print or laser-cut the grip-parts.

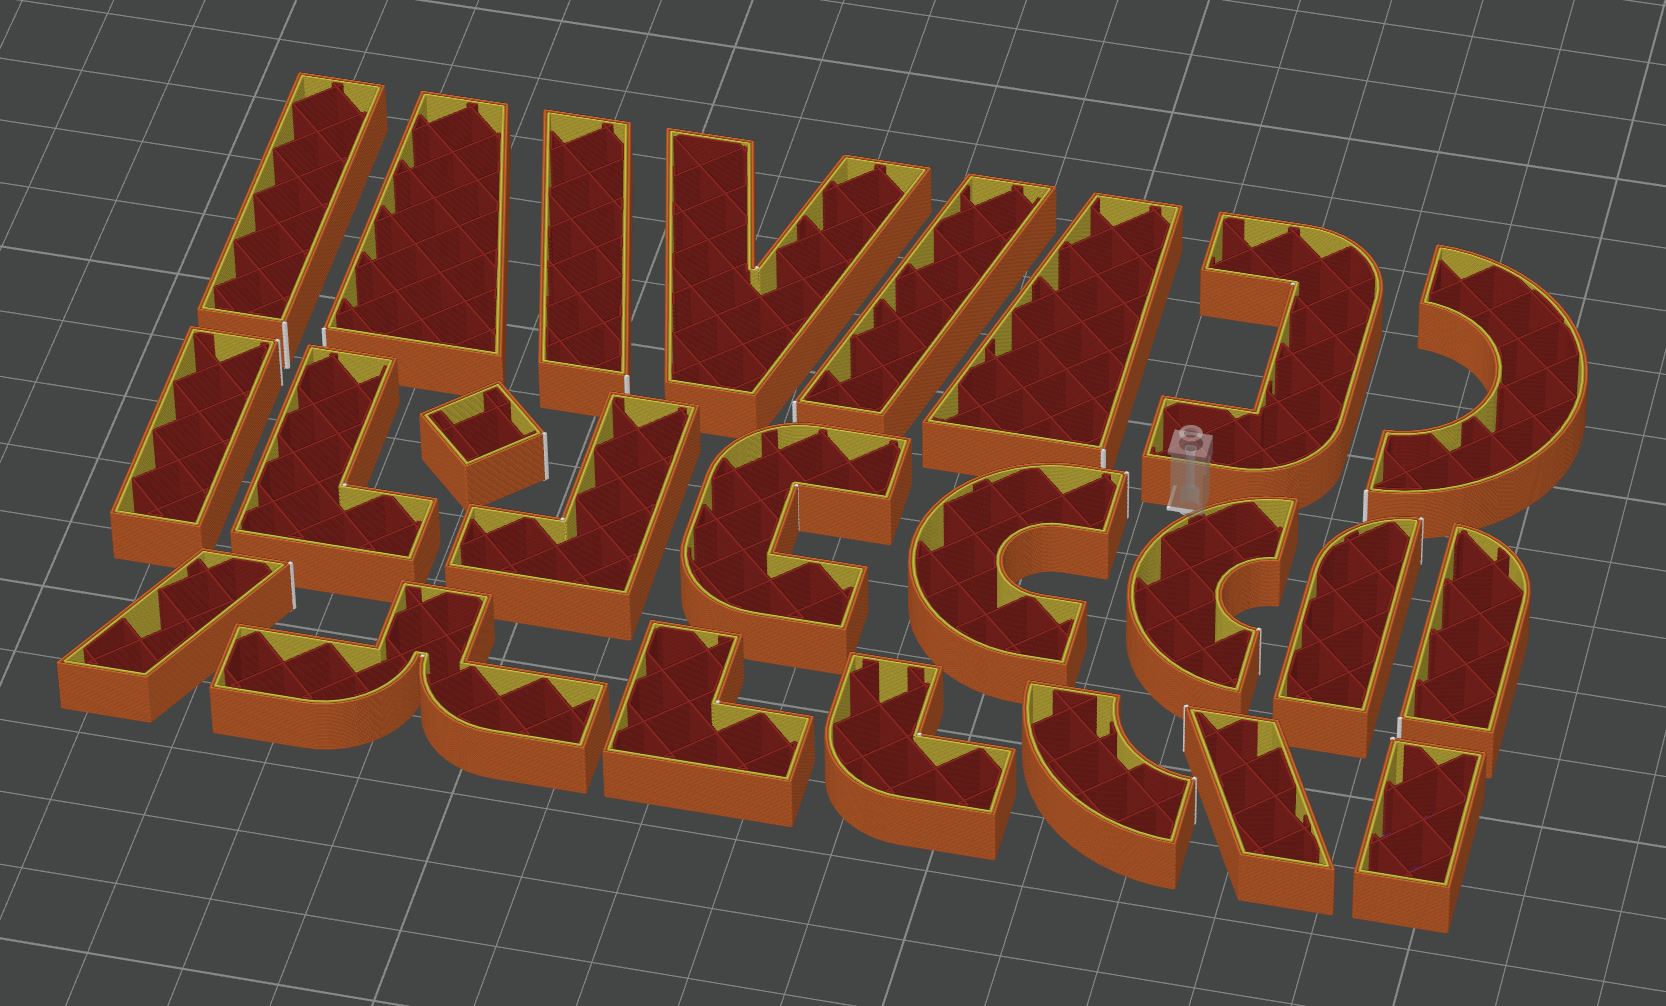
The kit can be produced in two different versions: Either by 3D-printing (1) the grips (A) of the stamps, or by using a laser cutter to create a sandwich with sheet materials like plywood or acrylic (2).
Each piece of the BlockFace kit consists of 5 layers: The grip-part (A), a piece of double-sided adhesive (B), the cushioning layer (C) made from laser-cut foam, another layer of double-sided adhesive (B) and the laser-cut stamp rubber (D).
What you'll need:
- Laser cutter for both versions (should be capable of cutting 3mm thick rubber)
- 2-3mm thick stamp rubber for laser cutting (example)
- Double-sided adhesive sheet (example*)
- 2mm thick EVA or EPDM foam (example*)
- For option 1: 3D printer (FDM and suitable for PLA printing)
- For option 2: Plywood or acrylic (select a thickness that your laser cutter can handle)
Note: This is not a tutorial on how to operate a laser cutter. Please only use materials that are safe for laser cutting and adhere to all necessary safety precautions. Ensure proper ventilation and wear appropriate eye protection.
*The adhesive and foam posed some challenges for us. Depending on the adhesive you use, it might not adhere well to the foam. You might find it more reliable to acquire foam with double-sided adhesive already applied, such as this EPDM foam from Germany.
We have included example links to online retailers; however, please note that the provided retailers might not offer delivery to all countries and regions.
Step 1: Download the files
Download the vector files for laser cutting and the 3D files for 3D printing from the following link:
Note: The files for 3D printing and laser cutting are released under a Creative Commons Noncommercial License and are intended solely for non-commercial purposes. If you're interested in selling the kit, please get in touch with us via email.
These files include a grid that you can print using a regular printer. It'll make it easier to use the BlockFace kit. Below, you can download the TypeBook, featuring 6 typeface styles that you can stamp with the kit.
Step 2: 3D printing the grips (skip this step if you are choosing option 2)
This is not a tutorial on how to use a 3D-printer, please reach out to someone with 3D-printing experience or watch this Youtube playlist by Thomas Sanladerer if you have not 3D-printed something before.
Print the 24 individual parts. The following print settings are suggestions, feel free to tweak them to your printer to achieve even better results (e.g. enabling ironing, seam positioning, etc).
We like printing them in PLA, but other materials should work as well.
Filename: BlockFace_openSource.stl
Suggested Print settings:
0.2 mm layer height
15% infill (any pattern)
2 perimeters
Needed filament: ca. 55g
Step 3: Laser cutting the grips (skip this step if you are choosing option 1)
Filename: BlockFace_lasercutting.dxf or BlockFace_lasercutting.svg
Size needed for one set of shapes: A6 (148 x 105 mm)

The 24 shapes are nested with a 3mm gap to save on material. Here are some things to consider:
- Pick a material and thickness that your laser cutter can cut without issues.
- The final grip part should be between 8 and 12mm thick to make it easy to hold, so two or three layers of 4mm material is a good choice.
- Sanding the top edges makes longer stamping-sessions more comfortable.
- Pick an appropriate glue to glue the pieces together (e.g. wood glue for plywood, super glue for acrylic, etc.)
- The finished pieces can be spray painted for a better look.
Step 4: Laser cutting the rest
Filename: BlockFace_lasercutting.dxf or BlockFace_lasercutting.svg
Size needed for one set of shapes: A6 (148 x 105 mm)
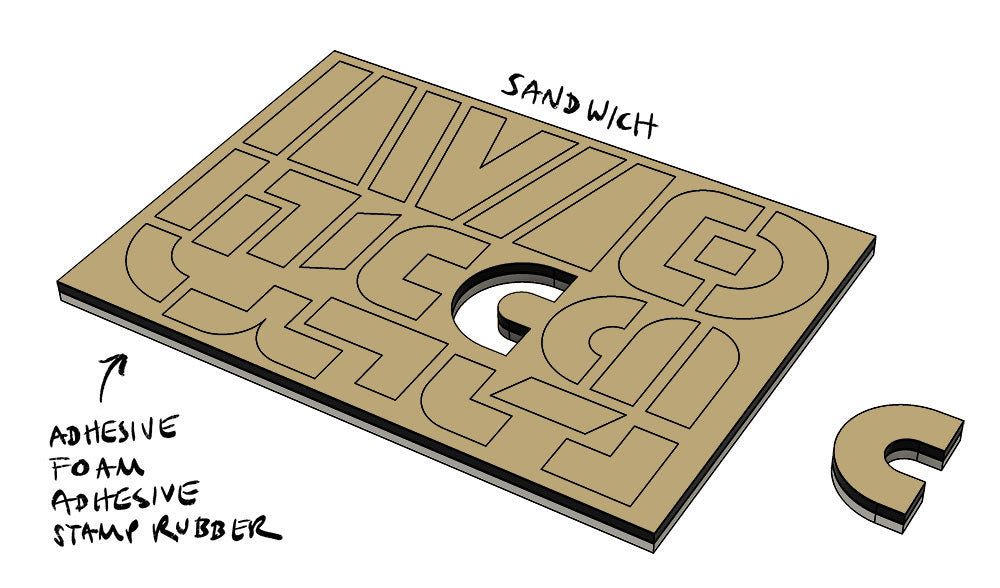
Depending on your laser cutter, you might be able to cut all the rest of the materials (double sided adhesives, foam, and stamp rubber) in one go. It will make the assembly a lot easier, but might need some testing. If your laser cutter has no trouble cutting through all materials at once, we suggest glueing everything together before you cut out the shapes. For that, make a sandwich consisting of the stamp rubber at the bottom, followed by a sheet of double sided adhesive, the foam, and finish with another sheet of double sided adhesive. Leave the backing of the adhesive on the top.
Note: If your laser cutter has trouble cutting through all the materials at once, you could try flipping the sandwich and trying to cut it from the other side. If it’s still too thick you could try to cut the layers 2 and 2, attach one layer of adhesive to each layer of foam.
Step 5: Assembly

Assembly is pretty straight forward, remove the protective paper of the double sided adhesive and align the grip part with the foam-rubber-sandwich. Press them together and you are done with your first piece. Repeat for the rest of the 24 pieces and you're done!
Step 6: Start Stamping!
Now it's time to try out your freshly made stamps! Feel free to share your designs on Instagram @blockface.kit and #blockfacekit, we would love to see them!
BlockFace Stamp Kit by Will Mower is licensed under CC BY-NC-SA 4.0![]()
![]()
![]()
![]()